A couple of weeks ago, while assisting in a workshop at Google DevFest Silicon Valley in Sunnyvale, I discovered a powerful way to supercharge GitHub workflows: combining the Gemini CLI with the Jules extension. This setup works in two powerful ways—first, it transforms your command line into an AI-powered development assistant that can review code, analyze pull requests, automate issue triage, and even create pull requests from issues all without leaving your terminal. Second, it enables GitHub Actions workflows that automatically use Gemini to perform tasks directly in your repository, such as automated issue triage, security scans, and PR reviews, all running automatically without any manual intervention.
Here’s a comprehensive step-by-step guide on how to set it up from scratch.
The Goal: An AI-Powered GitHub Assistant using Gemini
My goal was to use Gemini as an AI assistant directly within my terminal and/or Github Actions to help with my GitHub projects. I wanted to be able to:
- Review my own code for improvements
- Get feedback on pull requests
- Run security scans
- Automate repetitive tasks like issue triage
- Create pull requests directly from GitHub issues
To achieve this, I needed to connect Gemini to my GitHub account and give it the right permissions.
Prerequisites
Before we begin, you’ll need:
- A GitHub account
- A Google Cloud Platform (GCP) project
- The
gcloudCLI installed and authenticated - The
gh(GitHub CLI) installed - The Gemini CLI installed
Step 1: Set Up Your Demo Repository
To follow along with this guide, I recommend using the ai-student-assistant template as a starting point. This template already includes example workflows and configurations that work well with Gemini CLI and Jules.
Create a new repository using this template, or start with your own repository.
Step 2: GCP and GitHub Integration with Workload Identity Federation
The first and most critical step is to set up the authentication between Google Cloud and GitHub. This is done using Workload Identity Federation, which allows GitHub Actions to securely authenticate with Google Cloud services without needing to store long-lived credentials.
The setup script is available in the google-github-actions/run-gemini-cli repository. This repository contains GitHub Actions workflows to use Gemini for reviewing PRs, issue triage, and more.
Getting the Setup Script
- Navigate to your GCP Console and open Cloud Shell (or use your local terminal if you have
gcloudinstalled) - Create a file called
setup_workload_identity.sh - Copy the complete script from setup_workload_identity.sh

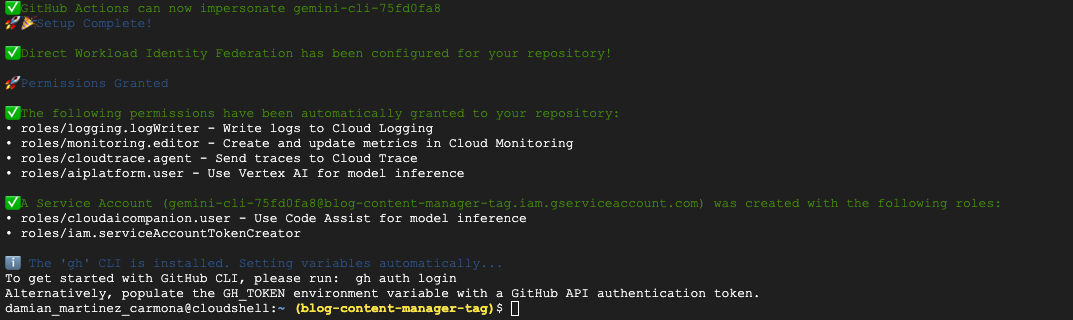
Important Fix: Service Account Propagation Issue
During my setup, I encountered an error: INVALID_ARGUMENT: Service account ... does not exist happening immediately after the “Service Account created” message. This is a classic “eventual consistency” issue in Google Cloud.
When you create a Service Account, it takes a few seconds (sometimes up to a minute) for that identity to propagate across Google’s global authentication systems. The script tries to assign permissions to it too quickly, before the IAM system recognizes the new email address.
The fix is to add a 30-second sleep immediately after the service account creation to allow for propagation. The script I used includes this fix around line 381-383:
# ADDED WAIT FOR PROPAGATION
print_info "Waiting 30 seconds for Service Account identity to propagate globally..."
sleep 30
Make sure your version of the script includes this delay if you encounter the same error.
Running the Setup Script
- Make the script executable:
chmod +x setup_workload_identity.sh - Execute the script with your repository and project information:
./setup_workload_identity.sh --repo YOUR_GITHUB_USERNAME/YOUR_REPO_NAME --project YOUR_GCP_PROJECT_ID
For example:
./setup_workload_identity.sh --repo DamiMartinez/gemini-workflows-demo --project blog-content-manager-tag
The script will:
- Enable required Google Cloud APIs
- Create a Workload Identity Pool and Provider
- Grant necessary permissions to the Workload Identity Pool
- Create a service account for Gemini CLI
- Configure the service account with required roles
- Set up repository variables automatically (if
ghCLI is installed)
This script is smart enough to check for the gh CLI and, if it’s installed, it will automatically set the required repository variables for you (GCP_WIF_PROVIDER, GOOGLE_CLOUD_PROJECT, GOOGLE_CLOUD_LOCATION, and SERVICE_ACCOUNT_EMAIL).
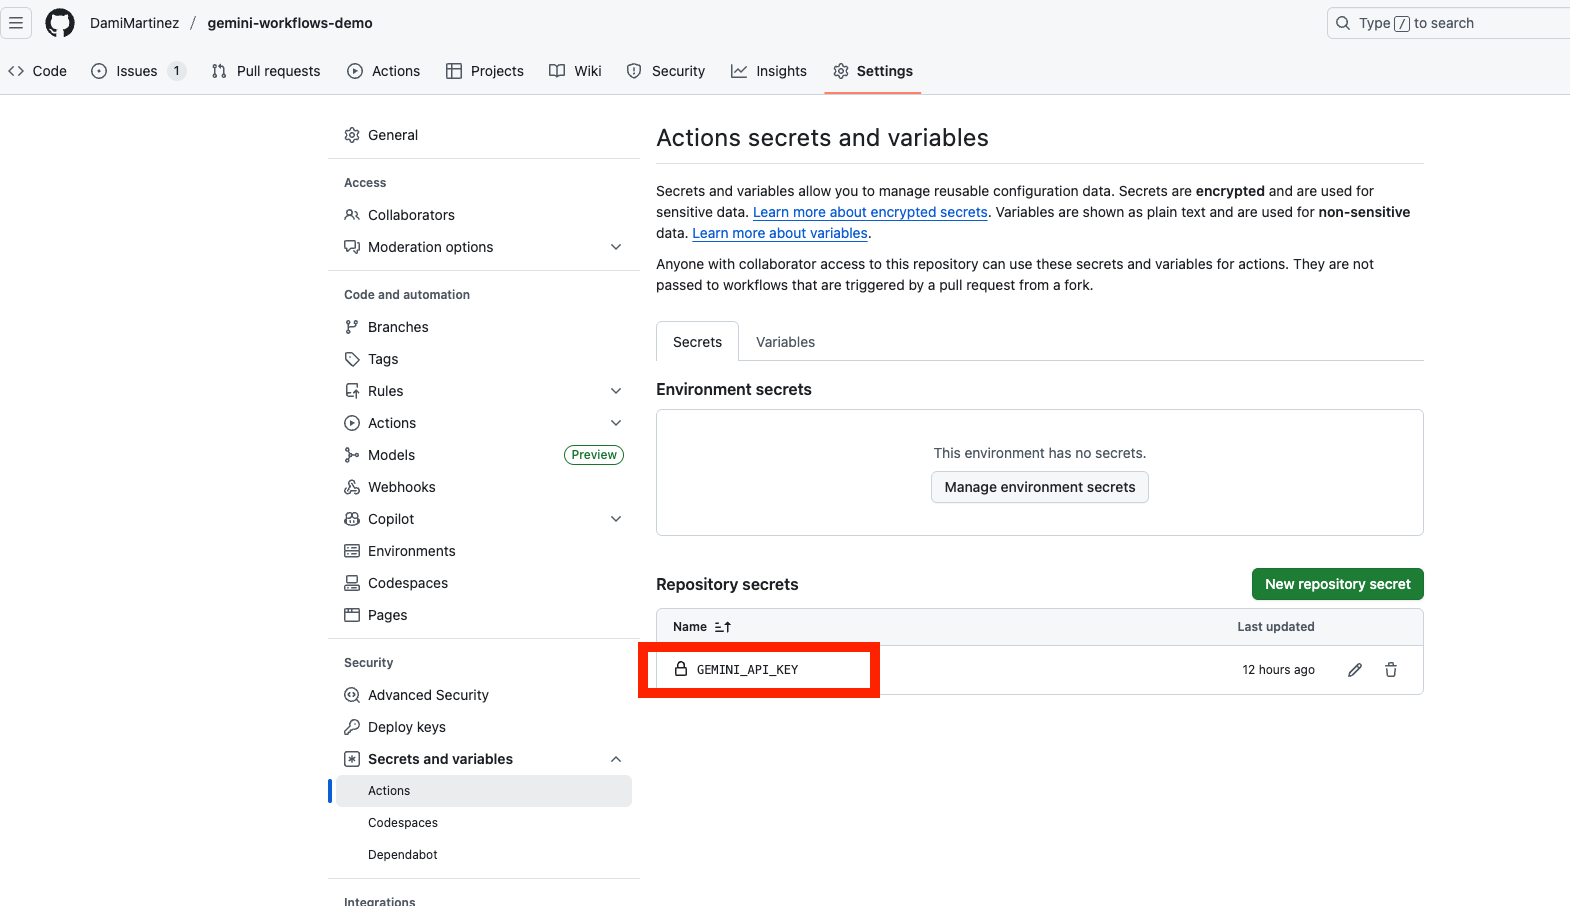
Step 3: Add GEMINI_API_KEY Secret
For the GitHub Actions workflows to work properly, you need to add a GitHub repository secret containing your Gemini API key.
-
Get your Gemini API key from the Google AI Studio or Google Cloud Console
-
Add it as a secret to your GitHub repository:
- Go to your repository on GitHub
- Navigate to Settings → Secrets and variables → Actions
- Click “New repository secret”
- Name:
GEMINI_API_KEY - Value: Your Gemini API key
- Click “Add secret”
Alternatively, if you have the gh CLI installed and authenticated, you can add it from the command line:
gh secret set GEMINI_API_KEY --repo YOUR_USERNAME/YOUR_REPO_NAME
This will prompt you to enter the API key securely.
Important: This secret is required for all GitHub Actions workflows that use Gemini CLI to function properly.
Step 4: Install the GitHub CLI
If you don’t have it already, you’ll need to install the official GitHub CLI, gh. This is essential for:
- The setup script to automatically configure your repository variables
- Gemini CLI to interact with your GitHub repository
Installation instructions are available on the official gh repository. On macOS, you can use:
brew install gh
After installation, authenticate with GitHub:
gh auth login
This will allow Gemini CLI to interact with your GitHub repository.
Step 5: Install Gemini CLI
Make sure you have the Gemini CLI installed. If not, follow the installation instructions at github.com/google-gemini/gemini-cli.
On macOS, you can install it using:
brew install gemini-cli
Step 6: Install the Jules Extension
Install the Jules extension for Gemini CLI. Jules is the core of the GitHub integration and allows you to start and manage tasks that interact with your repositories.
gemini extensions install https://github.com/gemini-cli-extensions/jules --auto-update
Authorize Jules Access
- Visit jules.google.com and log in with your Google account
- Inside the interface, grant Jules permissions to access your repository
- This step is crucial for Jules to be able to interact with your GitHub repos
Step 7: Clone Your Repository Locally
Clone the repository you set up in Step 1 to your local machine:
git clone https://github.com/YOUR_USERNAME/YOUR_REPO_NAME.git
cd YOUR_REPO_NAME
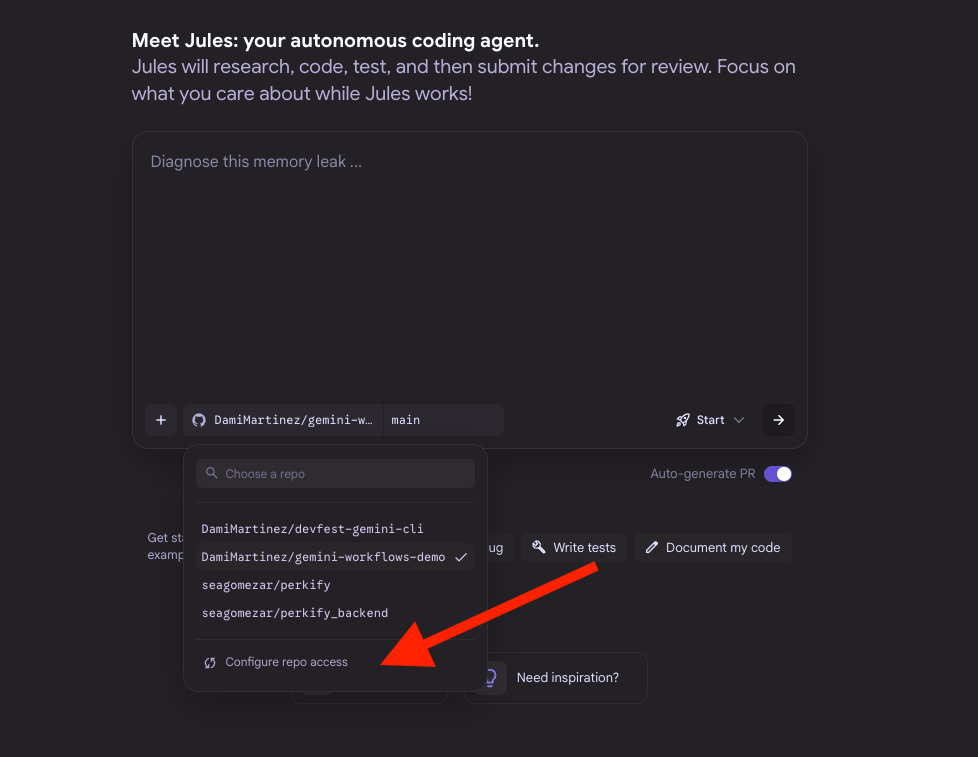
Step 8: Start Using Gemini CLI and Jules
Now for the fun part! Let’s start using Gemini CLI with Jules:
- Start Gemini CLI in your terminal:
gemini - Type
/julesto start Jules and complete the login step on screen. Once logged in, you’re ready to use Jules!

Step 9: Create and Fix an Issue
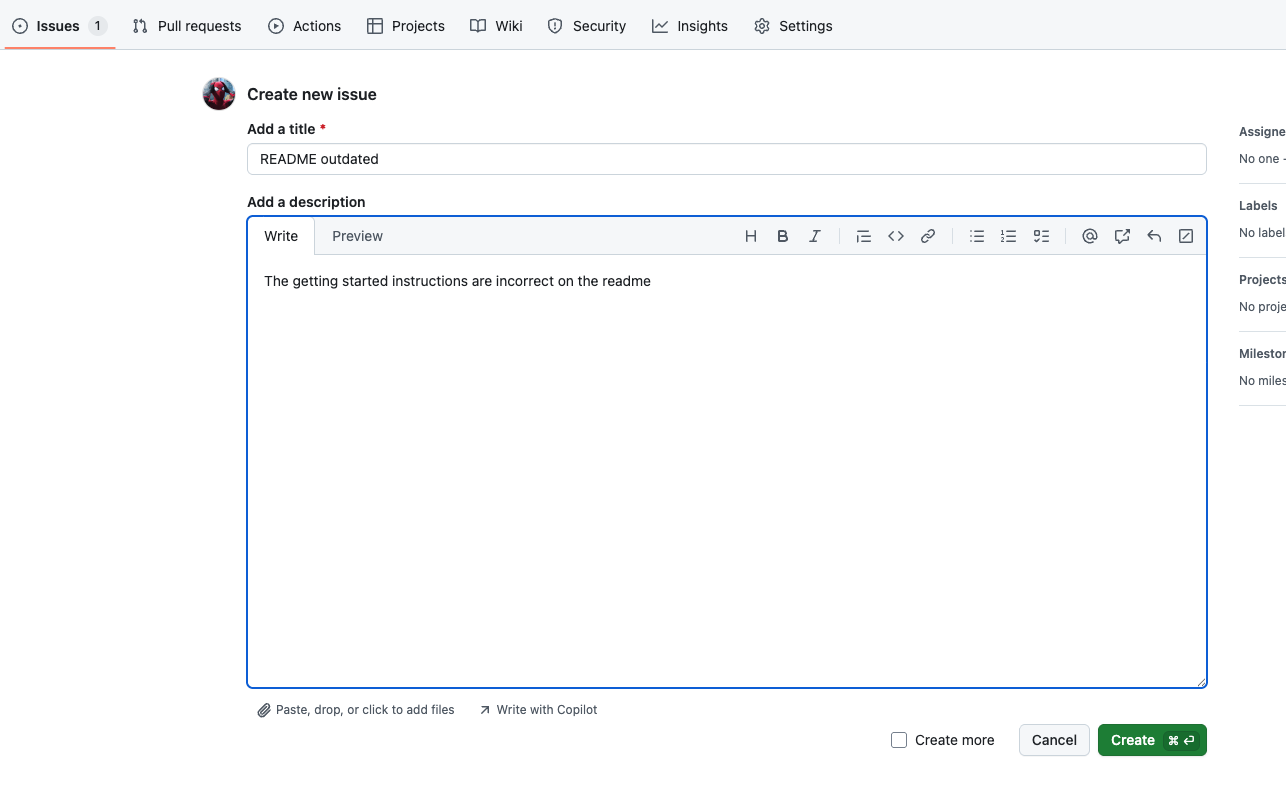
Let’s demonstrate the power of this setup by having Jules fix an issue:
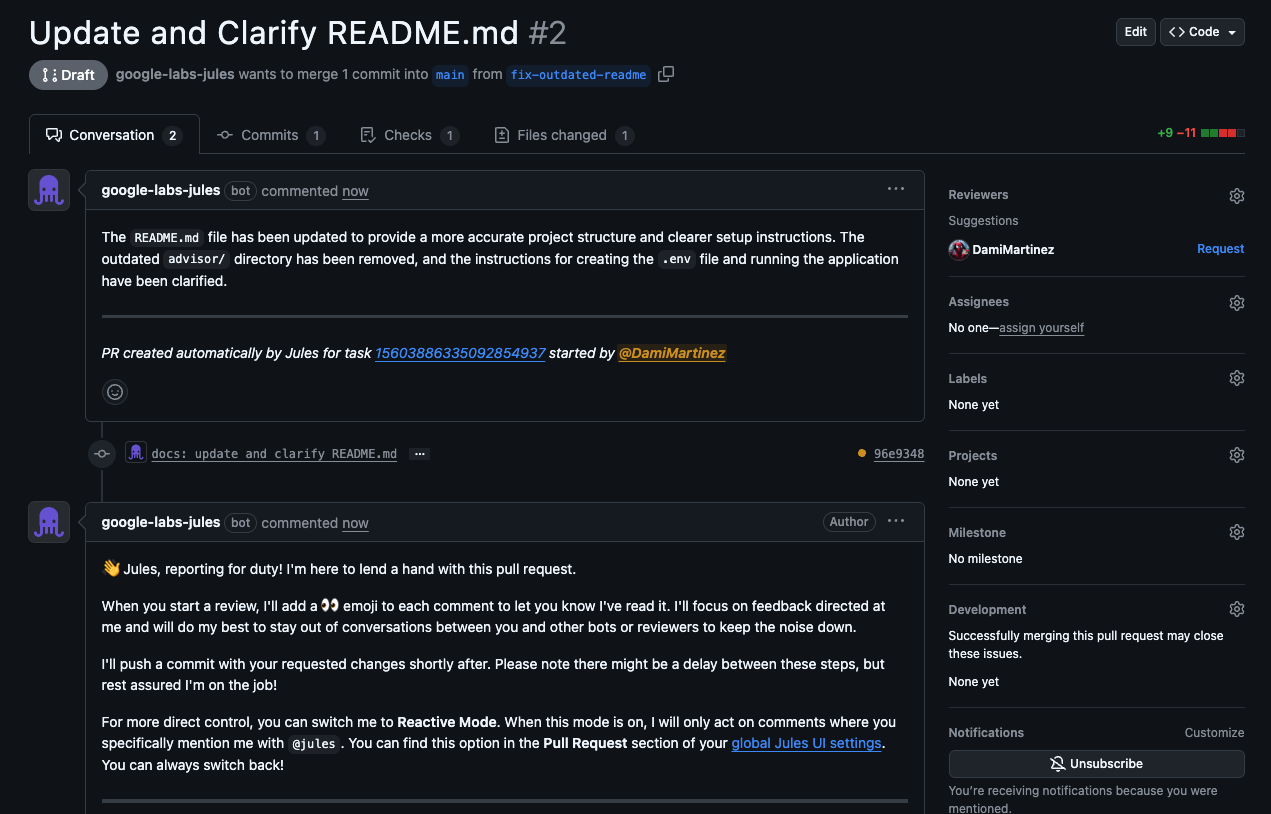
- Create an issue in your repository. For example, I created an issue claiming that the README is outdated and needs review to include the latest changes.
- In the Gemini CLI with Jules, ask it to pick up the issue:
/jules pick the top first Issues open on Github for this repo and fix it - Jules will automatically create a session to work on your task. You can:
- Follow the link it provides to track progress in the Jules web interface
- Use
/jules statusin the CLI to check the status of the task
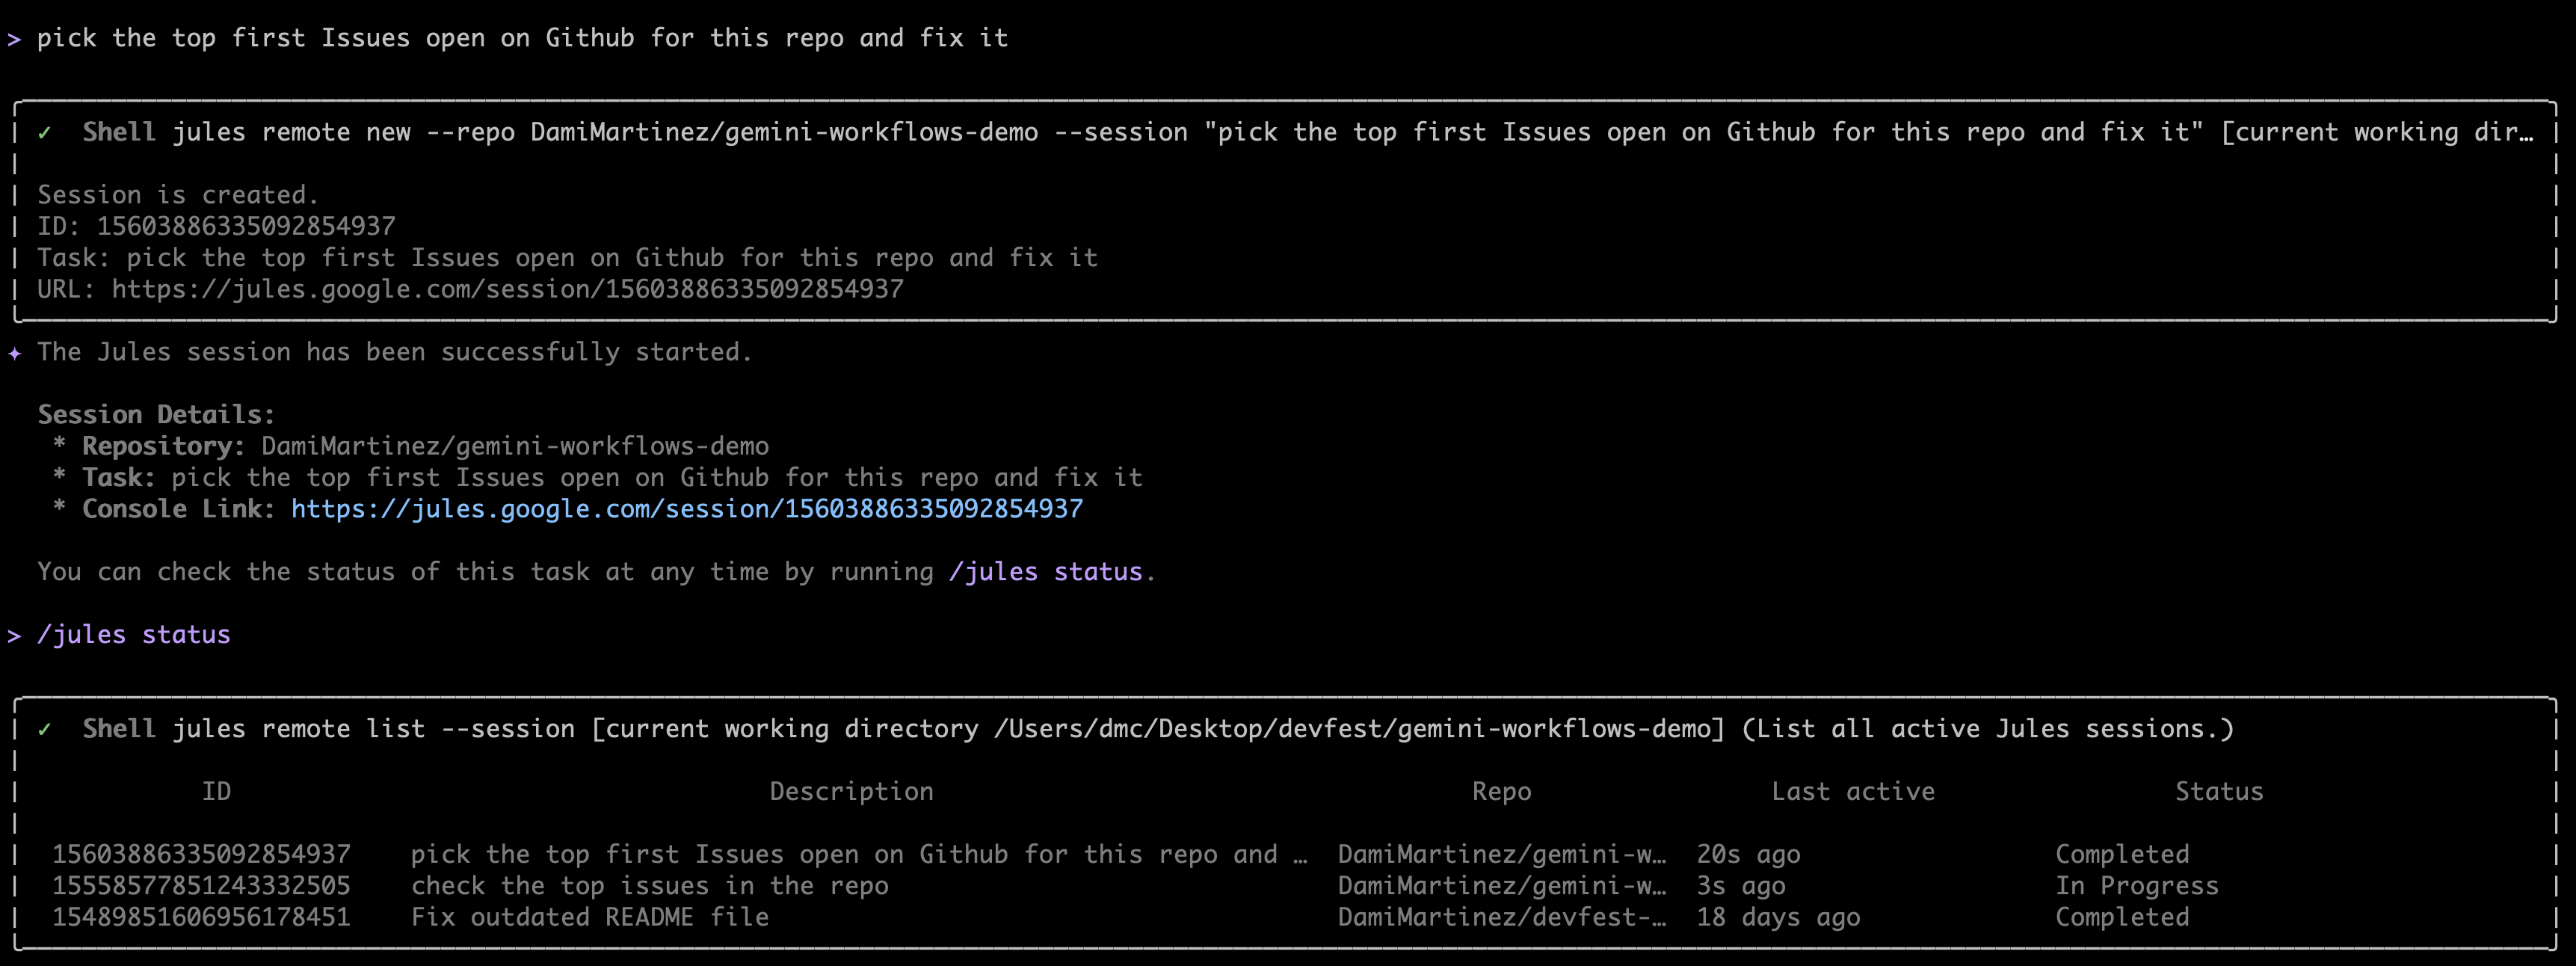
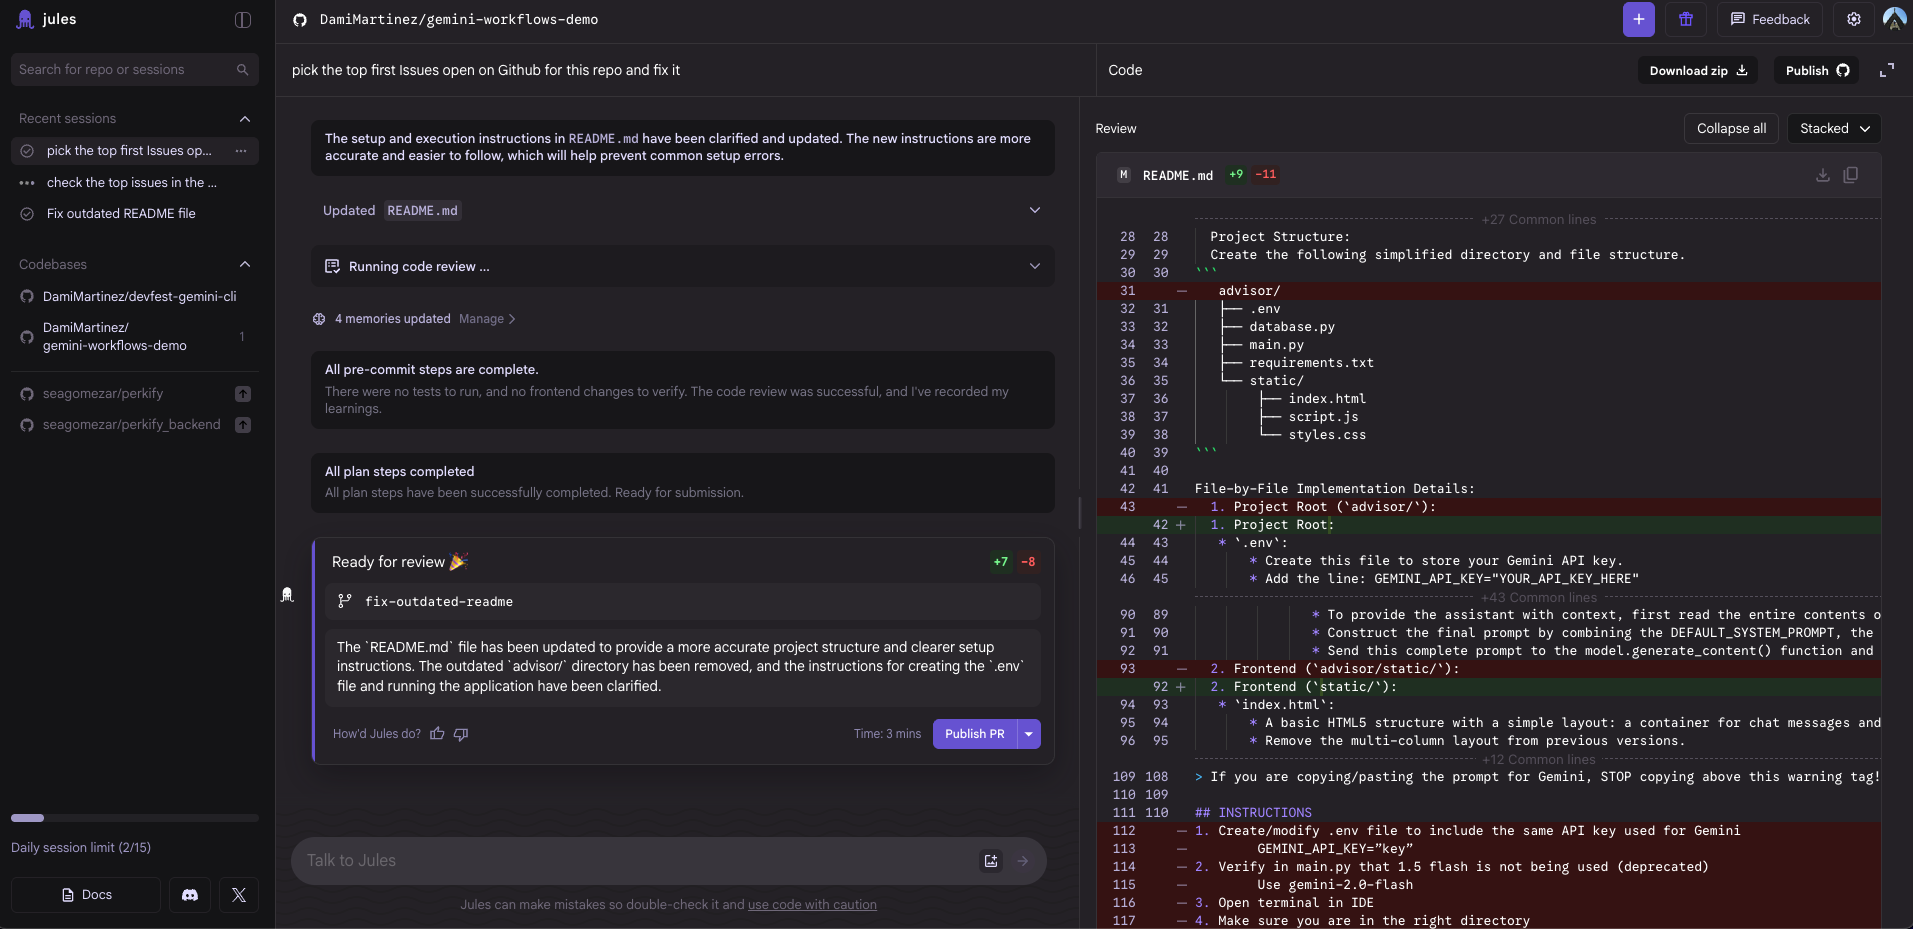
- When the task is finished, Jules will ask what you want to do next. You can:
- Ask it to create a PR
- Create a new branch
- Apply the changes locally
- Create a PR directly from the Jules web interface
- Once the PR is created, it will trigger any GitHub Actions workflows you have configured (including security analysis)
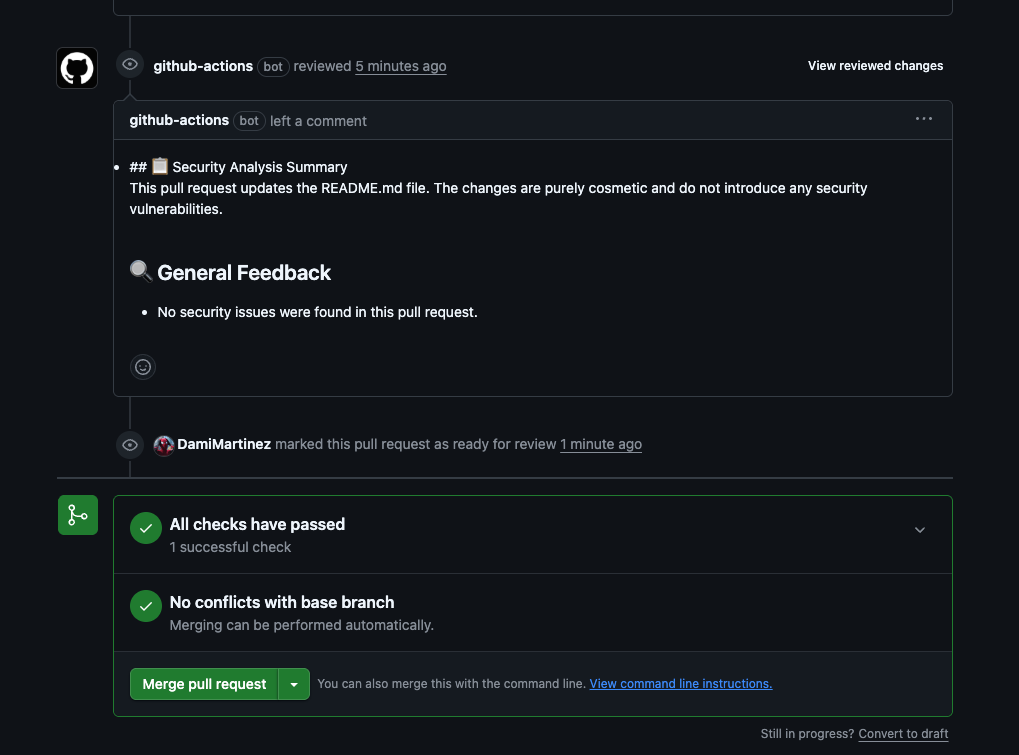
- Finally, when the PR is ready to merge, you can:
- Merge it manually and close the issue
- Ask Jules directly to do it
- Tag
@julesin PR comments to request changes or merging
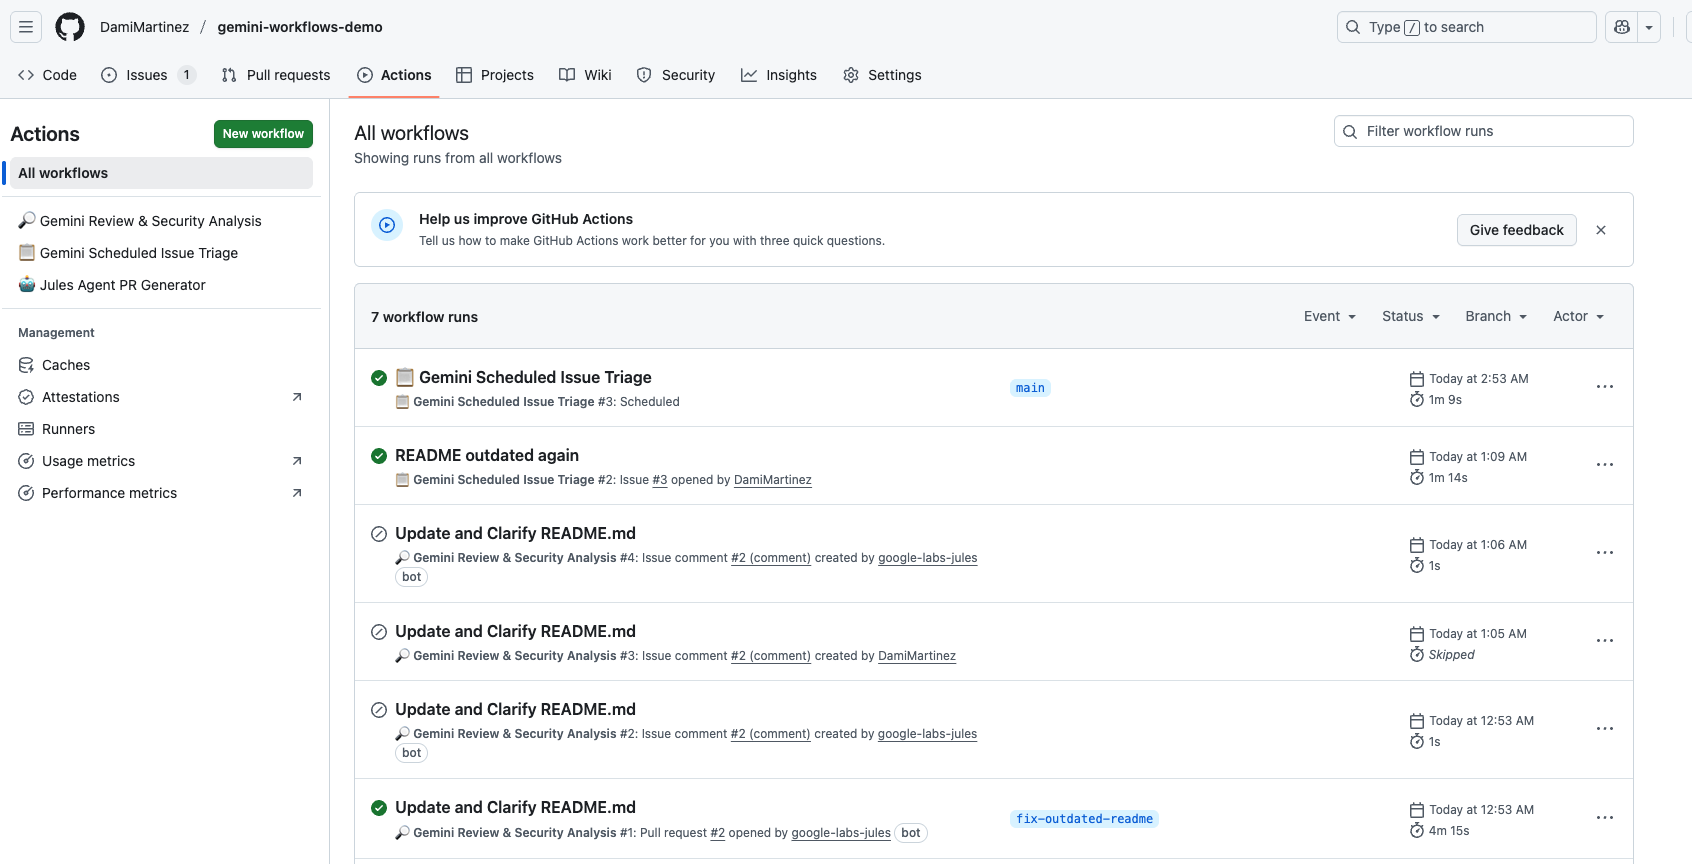
Step 10: GitHub Actions Workflows
The google-github-actions/run-gemini-cli repository includes several powerful GitHub Actions workflows you can use. I’ve implemented three in my demo repo:
-
Gemini Review & Security Analysis - Automatically reviews pull requests and performs security scans. See the workflow at gemini-review.yml
-
Gemini Issue Triage Automation – Automatically triage GitHub issues using Gemini. This workflow can be configured to run on a schedule or be triggered by issue events. See the workflow at triage-issues.yml
-
Jules Agent PR Generator - Automates PR generation from issues. See the workflow at jules-agent.yml
You can find more workflows and detailed documentation about what they do and how to use them in the google-github-actions/run-gemini-cli repository.
Optional: Security Extension
In addition to Jules, you can install the Security extension for Gemini CLI to run security checks on your repository directly from the command line.
Installing the Security Extension
Install the Security extension using:
gemini extensions install https://github.com/gemini-cli-extensions/security
Using the Security Extension
Once installed, you can use the /security:analyze command in Gemini CLI to perform security analysis on your codebase:
/security:analyze
This command will scan your repository for potential security vulnerabilities, insecure coding practices, and other security-related issues. The extension provides detailed feedback and recommendations to help you improve the security posture of your code.
The Security extension complements Jules’ capabilities and can be particularly useful for:
- Running quick security scans before committing code
- Identifying security vulnerabilities in your codebase
- Getting security recommendations tailored to your project
- Integrating security checks into your development workflow
What We’ve Learned
Throughout this guide, we’ve set up a complete AI-powered development workflow. Here’s what we accomplished:
Setup and Configuration:
- Configured Gemini CLI with GitHub CLI integration
- Installed and authorized the Jules extension for GitHub repository interactions
- Installed the Security extension for security analysis capabilities
- Set up Workload Identity Federation between Google Cloud and GitHub
- Configured GitHub repository secrets and variables
Interactive Capabilities:
- Interact with your repository directly from the command line
- Review and analyze GitHub issues
- Generate pull requests automatically from issues
- Run security checks on your codebase using
/security:analyze - Get AI-powered code reviews and feedback
Automation with GitHub Actions:
- Implemented automated workflows that use Gemini to perform tasks in your repository
- Set up issue triage automation to categorize and manage issues
- Configured security scanning workflows that run automatically on pull requests
- Created workflows for automated PR reviews and analysis
This setup brings the power of AI directly into your development workflow, enabling you to automate repetitive tasks, catch issues early, and maintain higher code quality with minimal manual effort.
Conclusion
Integrating Gemini CLI with GitHub through Jules has been a game-changer for my development process. It brings the power of AI directly into my workflow, making code reviews more thorough, security checks more accessible, and issue management more automated.
The initial setup might seem complex, but once configured, the benefits are substantial. You’ll be able to automate repetitive tasks, get instant code feedback, and leverage AI assistance throughout your development workflow.
If you’re looking for a way to boost your productivity and code quality, I highly recommend giving this setup a try. The google-github-actions/run-gemini-cli repository is an excellent resource with examples, workflows, and documentation to help you get started.